Working with Photos
In This Article
Before you get started here are the exact dimensions/proportions of the photos used in Instant Church Directory. The final photo dimensions used in the directory vary depending on the section where the photo is located. These sizes can help guide you to what orientation and size you use when uploading a member photo so no one gets cut off in the directory.
• Family Page photos: 2.0625" wide x 1.8125" high (618 pixels wide x 543 pixels)
• Pastor Page photo: 1.8125" wide x 2.0625" high (543 pixels wide x 618 pixels)
• Staff Page photos: 1.8125" wide x 2.0625" high (543 pixels wide x 618 pixels)
• Activity Page photos: 3.625" wide x 2.75" high (1087 pixels wide x 825 pixels)
All photos should be set to the highest quality print (the above pixels are for 300 dpi photos). The photo color palette should be sRGB (not RGB). Photos can be one of these file types: JPG, PNG, TIF, HEIC or GIF. A GIF photo will typically be low resolution and not good for a print directory.
If you find the photo you have is cropped in such a way that part of a person is cropped out of the photo upon upload, we recommend editing your photo to add white space above. See below for instructions on how to do this.
Uploading Member Photos
Each family in the directory can have one image associated with their family. You upload the photos under the Edit Family dialogue by clicking the Import Image button.
Choose the file to upload. Once it uploads, you can crop the image. Then his Save.

Uploading multiple photos at one time
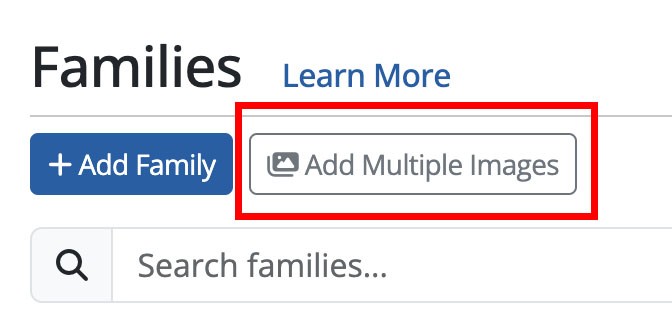
If you are building your directory for the first time, you can also click the Add Multiple Images button. Because you're uploading over the internet you may want to consider keeping your batches on the smaller side in case your connection is interrupted.
IMPORTANT: You must complete all 3 steps in the process in order for your uploaded photos to be saved. Photos are not saved until they are attached to a family or individual record. They are only saved in a temporary folder until they are attached to a record.
Go to Families and click on the Add Multiple Images tool.
Then you'll see Step 1 - Choose Images. Click the Choose Files button and select the images from your computer to upload.
Under Step 2 - once you see all of the photos you are uploading listed, choose Upload Photos. Each image will be uploaded for Step 3.
Then click Step 3 - Add Names/Attached Family link. Here you have the choice to match each image to an existing family or Create a new family.
Once you have processed each photo, be sure to click the Save button. If you do NOT want to attach a photo to an existing or new family, click the Delete button and that photo will not be added to your directory. When you are finished, all photos will be added to your directory with the family names!
Asking Members to Submit a Photo
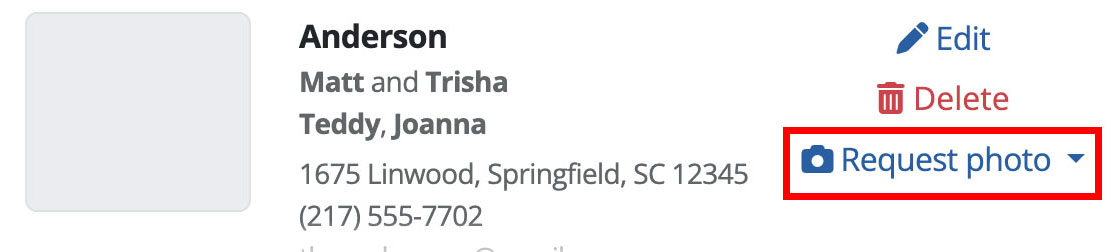
Members can submit a photo by following a link that you provide them. The link can be found underneath each individual family’s information on the Families Tab. You can either copy and paste the email message including the link by selecting "Request A Photo Message" or, if you have an email client like Outlook, you can select "Request Photo via Email’. This link will not work if you use a browser for your email program (like Gmail).
When the members click on the link in the email you send, they are taken to a page where it is simple for them to browse their photos, upload, and submit it to you. It usually takes less than 5 minutes.
Or, your members can Submit Their Own Updates to the Directory including photos!
How to invite a family to submit a photo
You'll review how to use the email feature or the copy to clipboard feature to request a photo as well as how to attach a photo submitted by a member to the correct family in the directory.
Approving Photos Uploaded by Members

When reviewing the photos that have been submitted, you can choose to assign them to a family and save them in the directory or you can choose to delete them.
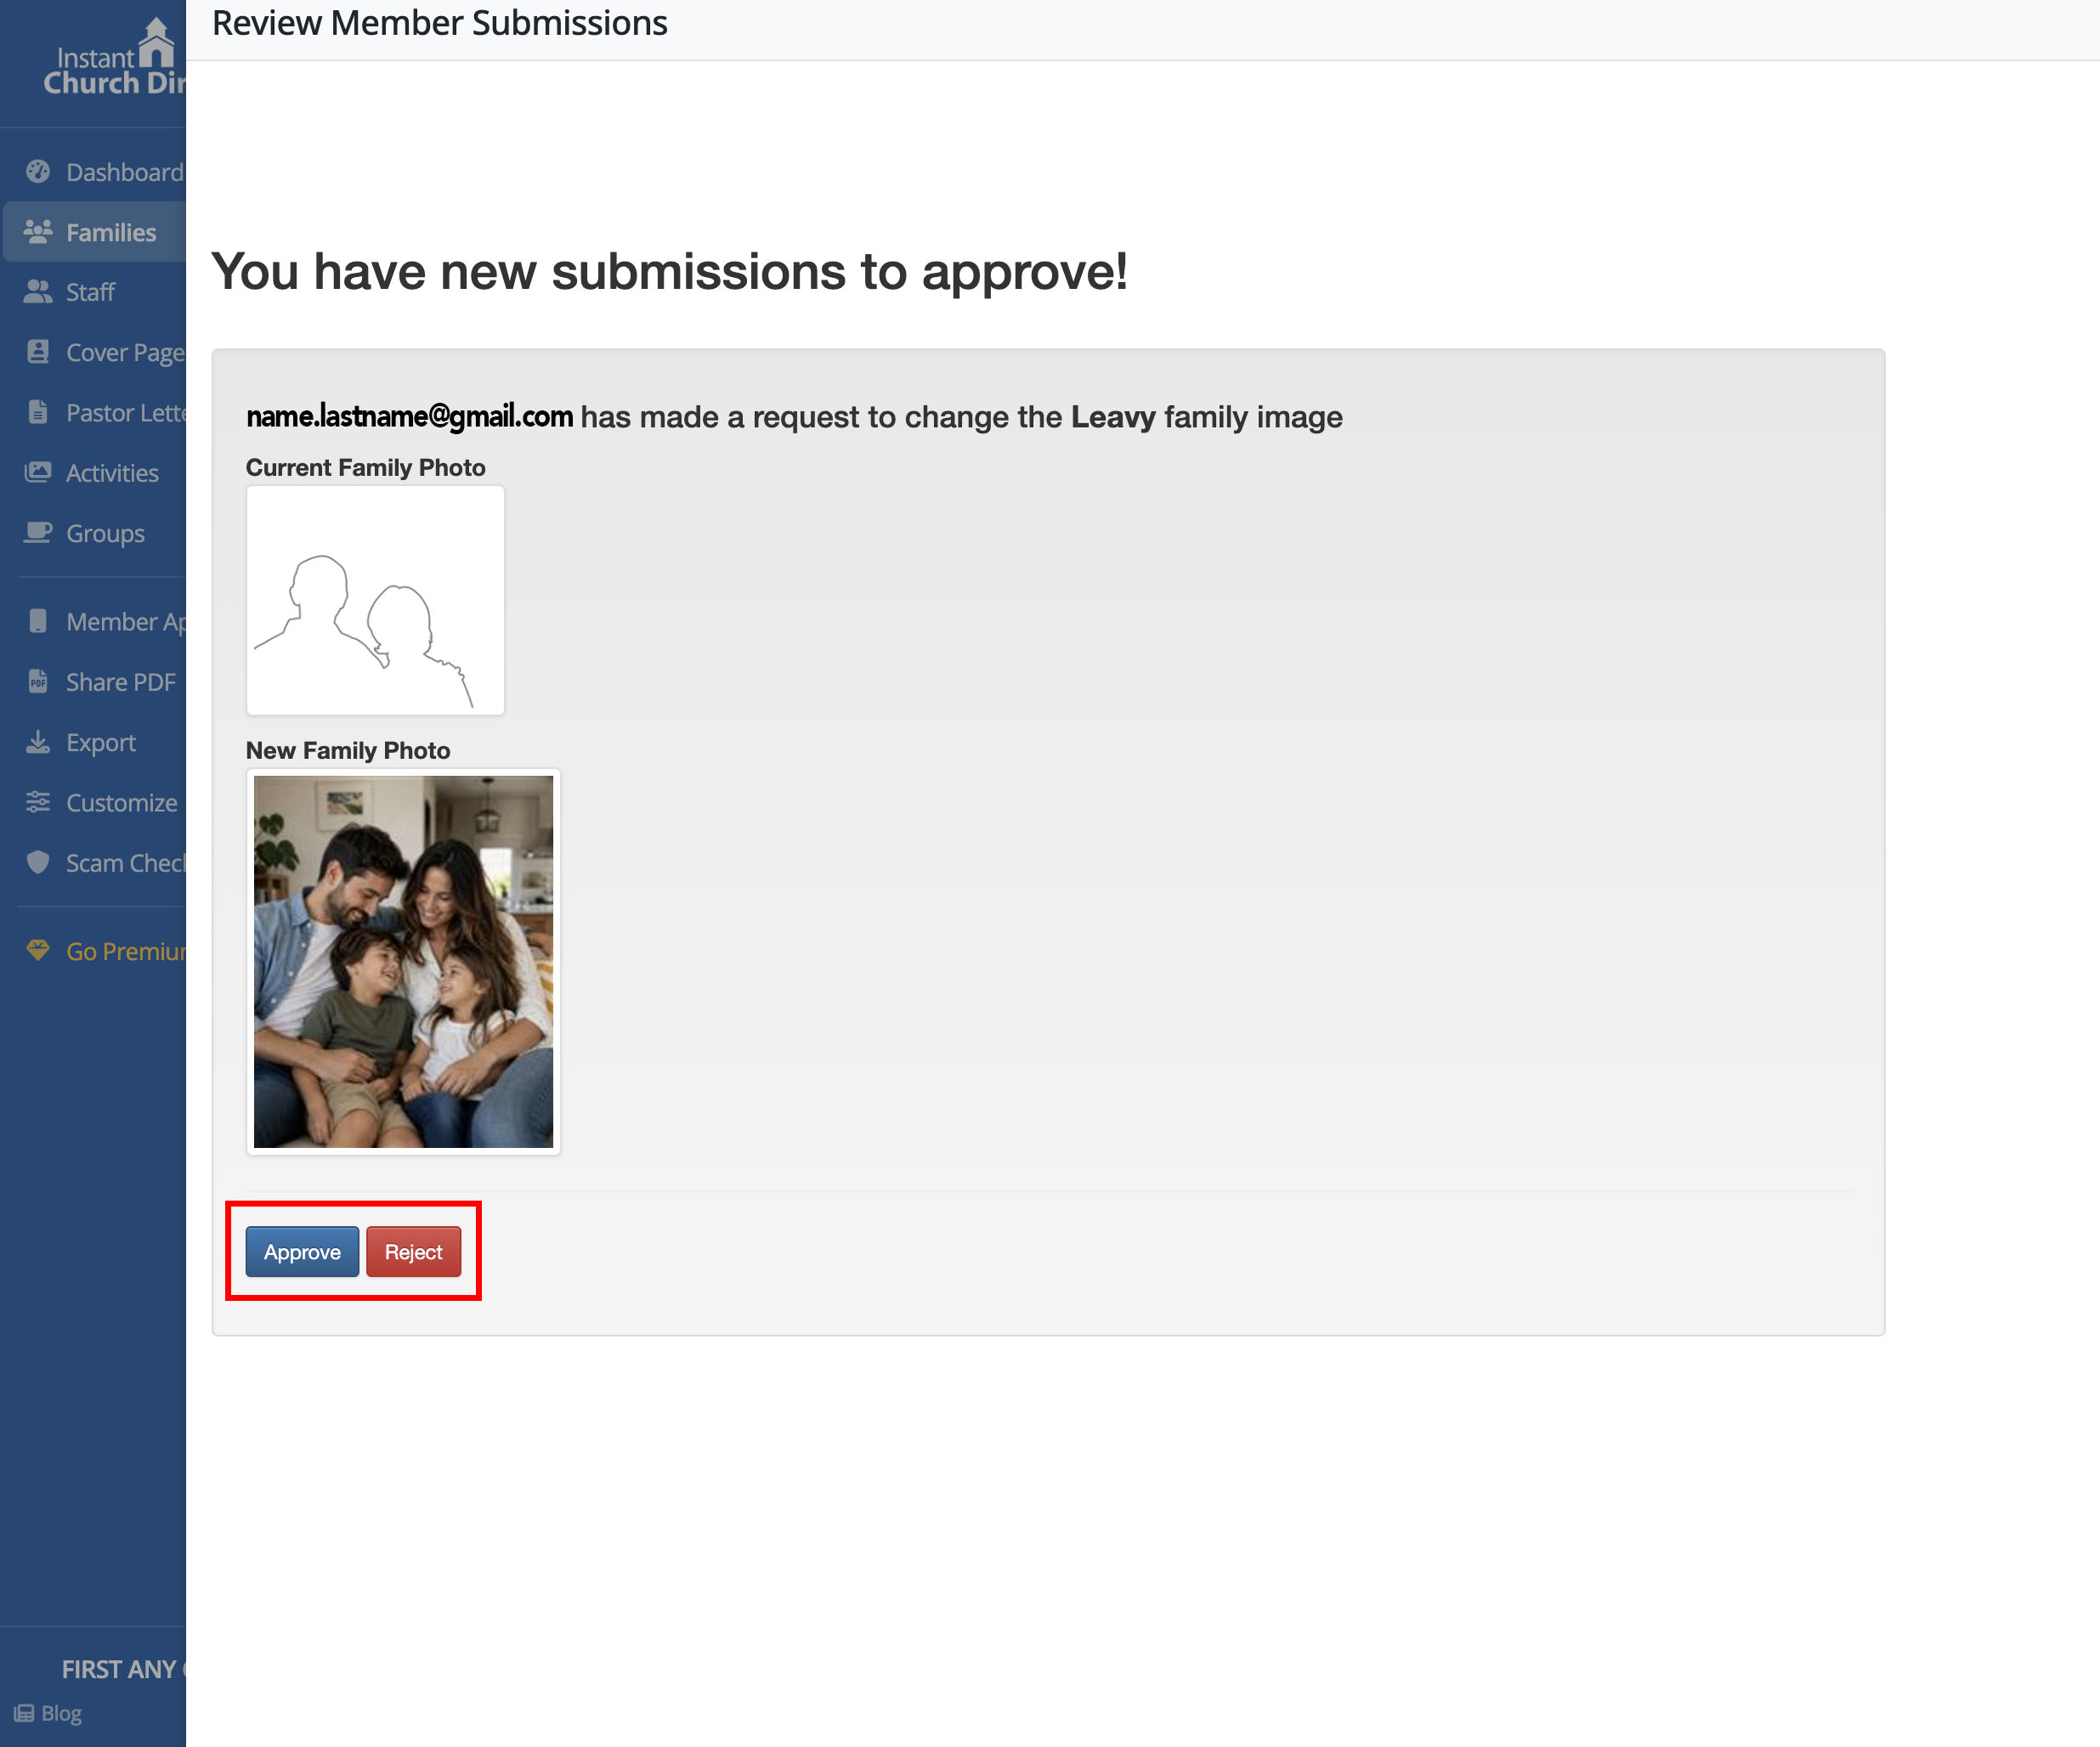
If you do not choose to save or delete, the picture will remain "in review" until you choose one of the options. Photos will not show in the directory until you choose "Save." You will see notifications that you still have photos ready for review on all the page views.
Frequently Asked Questions
Do the pictures we are taking with a digital camera need to be a certain size to work with the Church Directory software?
You can use any resolution picture and Instant Church Directory will optimize it for both quality and performance. Most digital cameras and mobile devices will automatically be set to take a picture at a high resolution and will work with Instant Church Directory. If a photo is copied and pasted from Facebook or other social media, the resolution will be low and may have a grainy appearance when printed in a directory. Instant Church Directory will store the images at a resolution of 300 dpi regardless of what resolution image is selected.
For more specifics on sizes, please see above.
Can I change the number of photos on the family or staff pages?
It is not possible to change the number of photos on the family or staff pages. The layout also cannot be altered at this time.
Is there a way to export all of the ICD Online pictures and directory data if we have a need?
We recommend you back up all photos you upload to Instant Church Directory in case you need them for some other purpose.
You can export the family list as a csv file from the link on the bottom left side of the Family tab.
Currently, you can only export the images in your directory PDF. You will not be able to export photos that you've uploaded to Instant Church Directory as individual, printable high-resolution images. If you are OK with a low-resolution image, you can save images from the Member Website as you would any image from the internet.
Can we use pictures taken by professional photographers in our directory?
Technically any person who takes a photo owns the copyright to that photo and it cannot be used in any form without the permission of the person who took the photo. The person who was photographed should obtain permission from the photographer for the image to be used in Instant Church Directory. If members upload a professional photo they need to have written permission from the photographer.
Adding white space to a photo
A photo-editing program, such as Photoshop or Photo-Paint, can do this. If you don't have a photo-editing program, you can use Windows Paint, which comes with all versions of Windows. You'll find Paint in the Accessories folder.
In Paint:
- Open the photo.
- Highlight the entire photo using "Edit" > "Select All" (or Ctrl+A).
- Use "Edit" > "Copy" (or Ctrl+C) to copy the selected area.
- Delete the selected area, so the entire picture is a white background.
- Use "Image" > "Attributes" (or Ctrl+E) to enlarge the background. Keep the width the same, but change the height to be equal to the width. For example, if the photo is 3" wide x 2" high, make it 3" x 3". (You may need to experiment with the dimensions, depending on the photo.)
- Use "Edit" > "Paste" (or Ctrl+V) to paste the copied photo into the enlarged area.
- While it's still highlighted move the photo to the bottom of the frame.
- Use "File" > "Save As" to save the edited photo with a new name, so it doesn't overwrite the original.