
Managing Families
In this Article
Add a person to an existing family
Update a person within a family
Adding Additional Details and Notes
Add a family
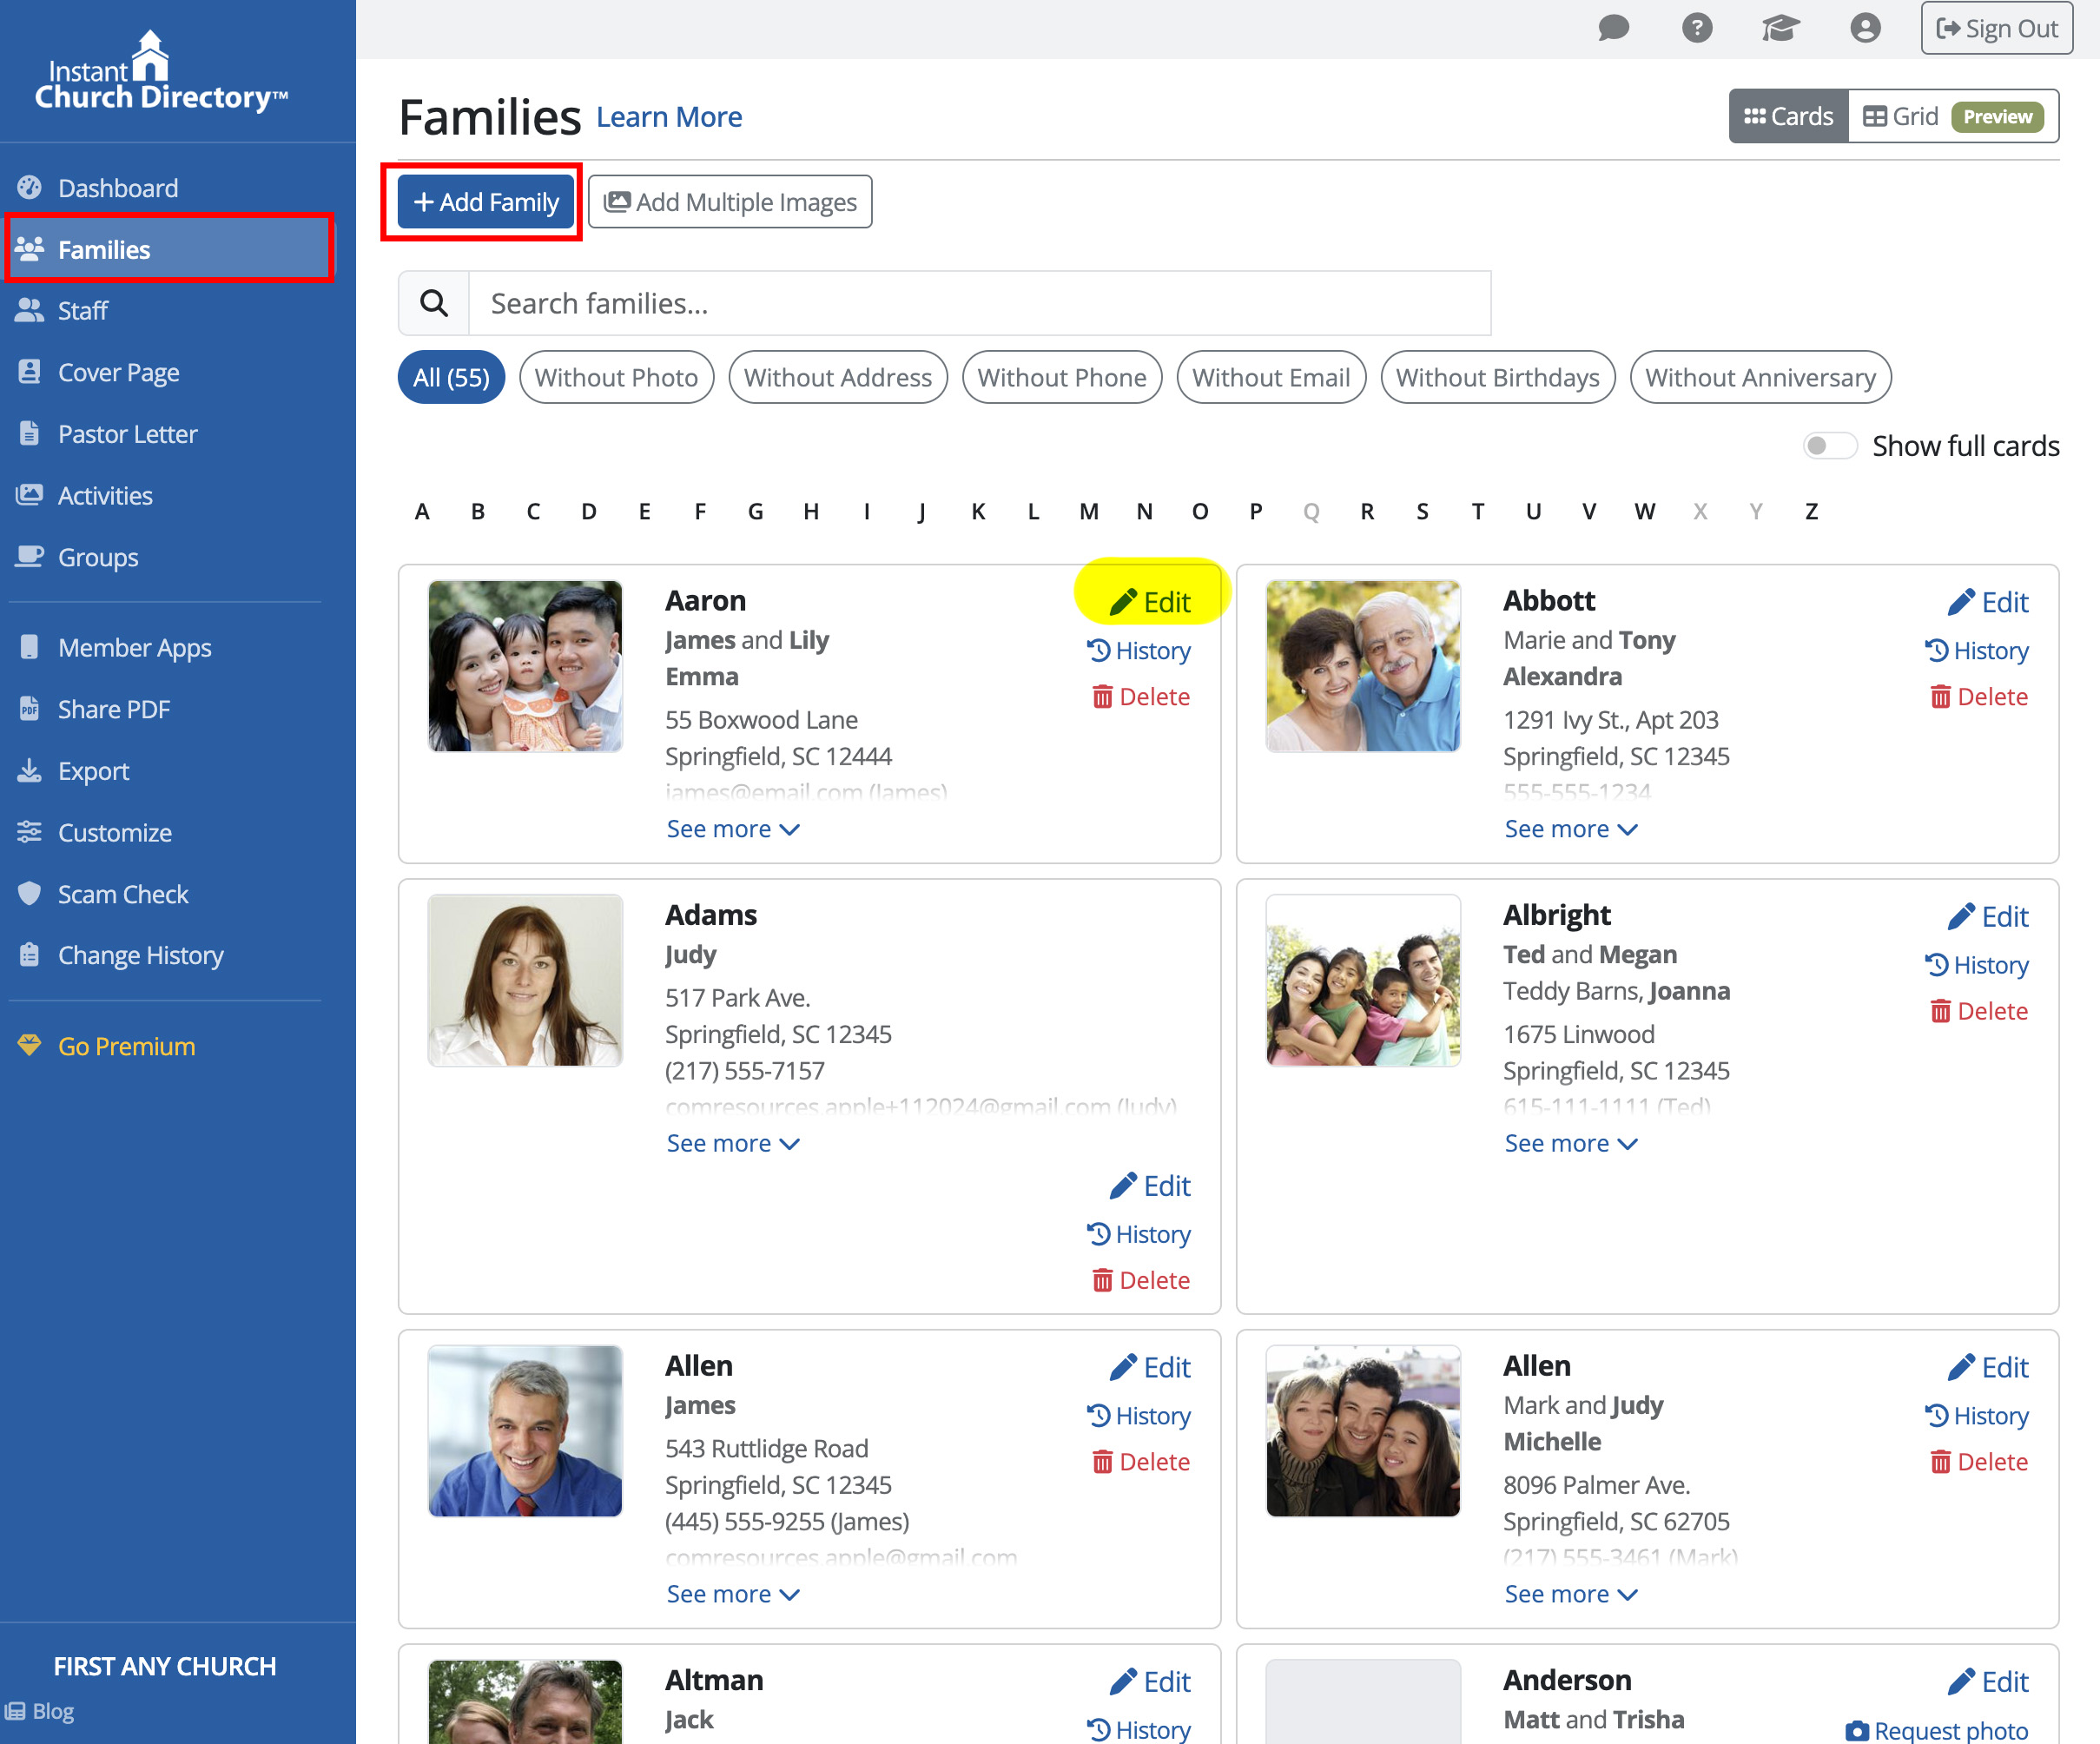
To add a new family, start on the Families page and click Add Family.
Enter the family’s basic information, including their last name, address, and anniversary, then click Save.
Tip: It’s usually best to add email addresses and phone numbers when you add the individual family members. In most cases, the family email should be a shared email address, and the family phone number should be a landline.
Once the family record has been created, you can add people to it:
- Click Add Adult/Parent to add an adult.
- Click Add Child to add a child.
Enter that person’s details, then click Save. When you're finished entering your data, click the X to close the Edit Family card.
Update a family
To update a family’s information, locate the family in the list and click Edit Family.
Make any needed changes, then click Save at the bottom of the page.
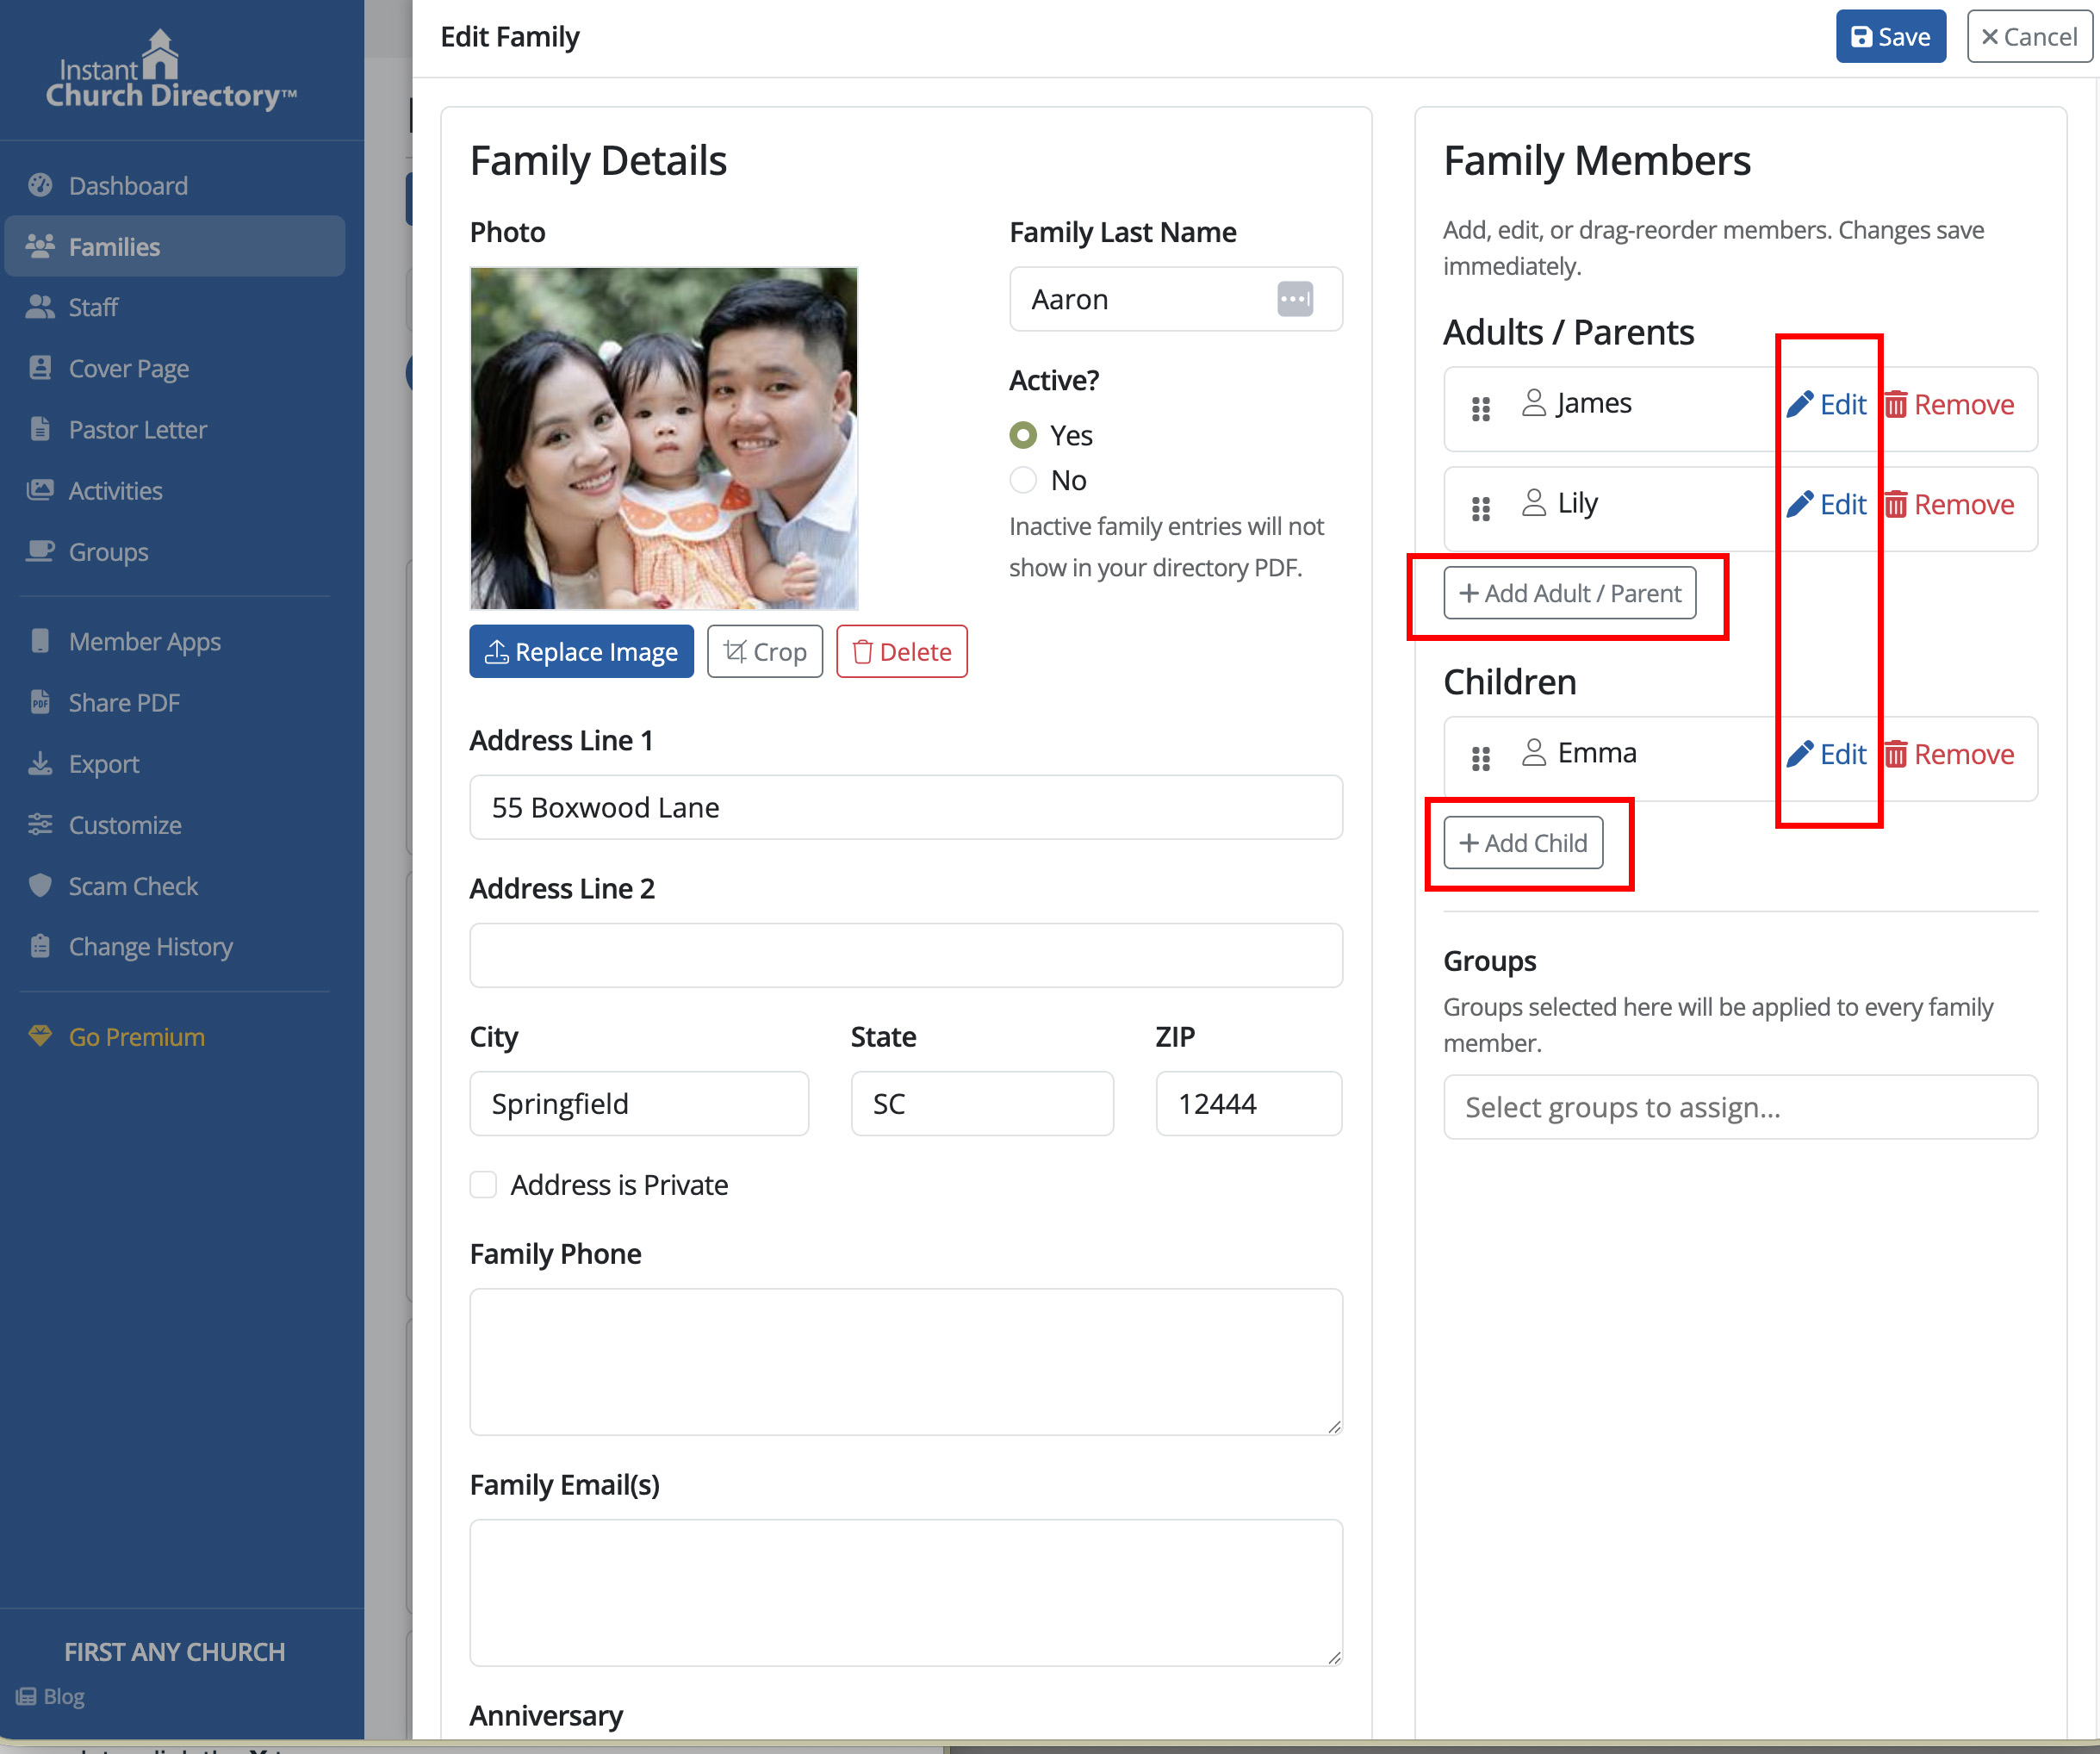
Tip: Use the search bar or filters at the top of the Families page to quickly find a specific family, especially in larger directories.
Add a person to an existing family
To add an adult or child to a family that already exists, open that family by clicking Edit Family.
On the right side of the page, click Add Adult/Parent or Add Child.
On the Edit Family Member Details page, enter any information you want to include for that person, such as:
- membership details
- birthday
- personal email address
- phone numbers
Then click Save.
If someone in the family uses a different last name, you can add it by clicking the link under the First Name field.
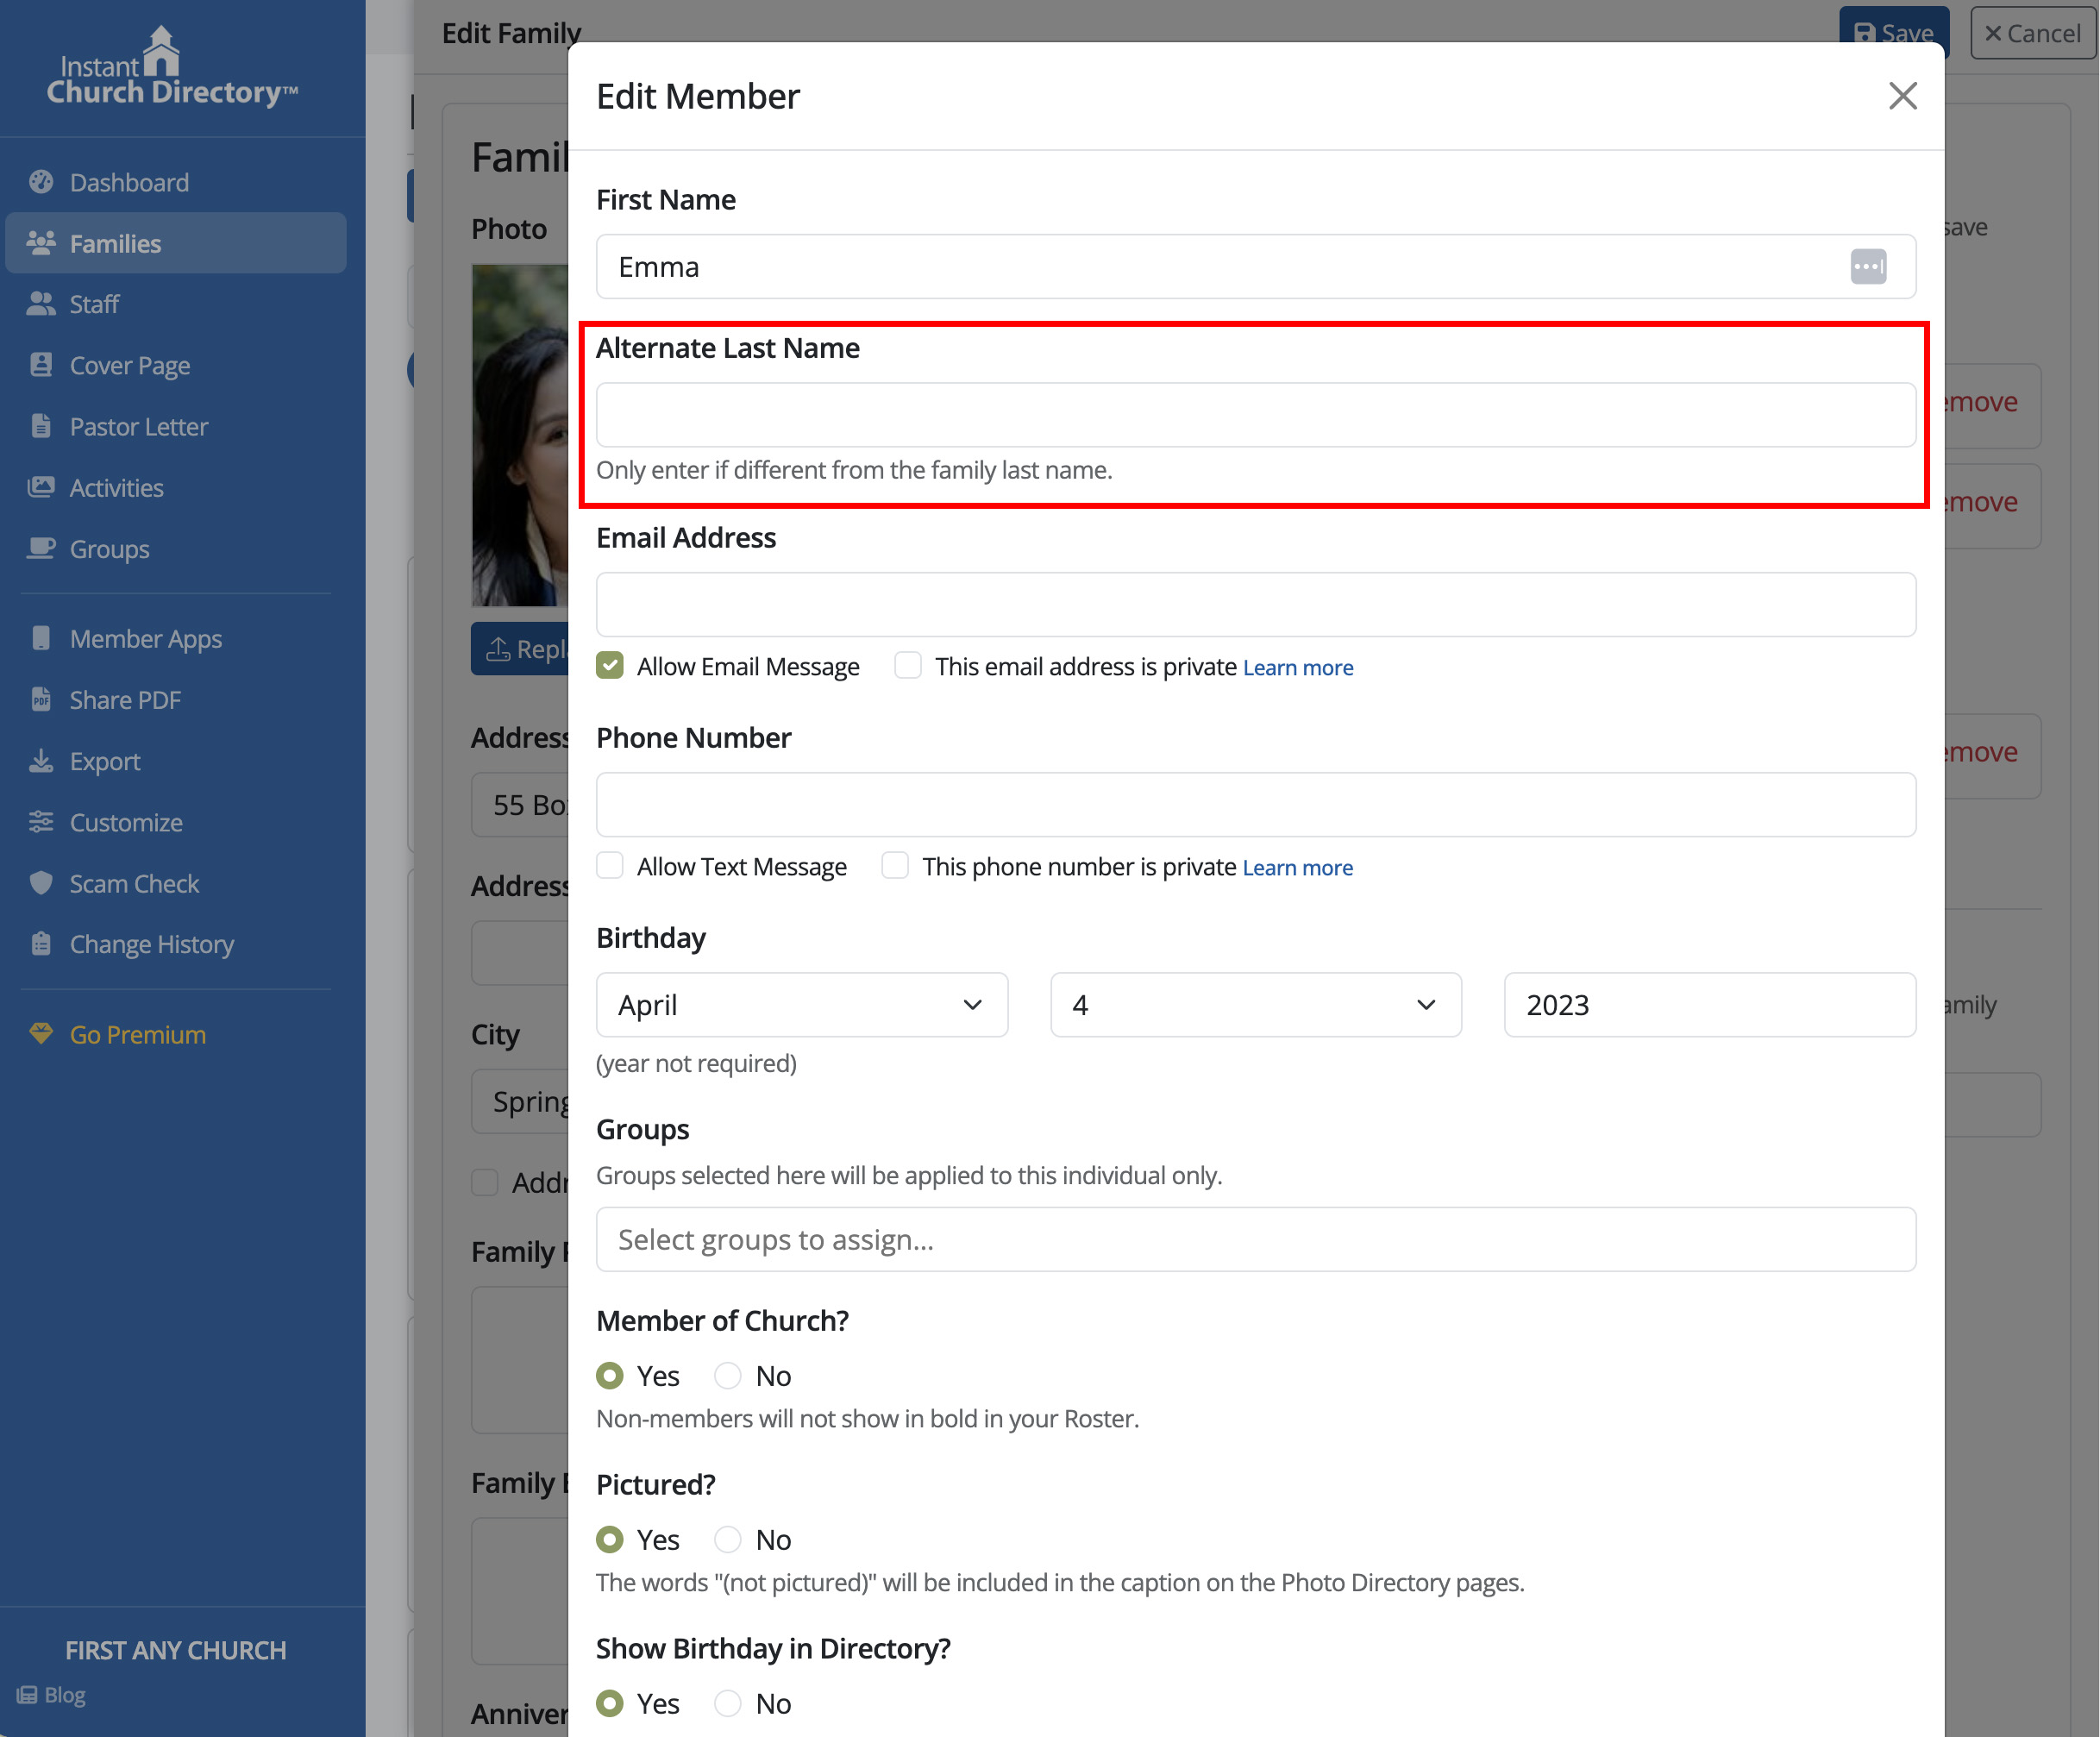
If you’d like to include a maiden name, you can use the different last name option and place the name in parentheses.
Update a person within a family
To update an adult or child in a family record, click Edit Family for that family.
In the Adults/Parents or Children section, click the person you want to update.
Make your changes on the Edit Family Member Details page, then click Save.
Privacy settings
Some members may prefer not to share all of their information. As you update family records, be sure to review privacy settings for:
- family addresses
- adult email addresses and phone numbers
- child email addresses and phone numbers
Marking these items as Private does not prevent your members from logging into the Mobile App and Member Website.
Please note that some members may prefer not to share their information with others. When updating the directory, pay attention to privacy settings for family addresses, as well as the email and phone numbers of both adults and children. Refer to our document concerning church member privacy for guidance on locating and adjusting these settings.
Adding Additional Details and Notes
Additional Details
The Additional Details field appears in all versions of the directory. This is a great place to include things like a second address, job information, or other details you want your congregation to see.
Notes
The Notes field does not appear in the PDF or electronic directories. This is a good place for church staff to keep internal notes that should not be visible to members.
Remove a family or a person
If you want to remove a family from the directory, you have two options: mark them inactive (reversible — keeps their record but hides them from the directory) or delete them (permanent — removes their record entirely). You can also remove just one person from a family record without affecting the rest of the family.
Mark a family as inactive
If you'd like to keep a family in your records but leave them out of the directory, open the family by clicking Edit Family.
At the bottom of the page, find Active?, select No, and click Save.
Inactive families stay in your records, but they won't appear in the directory or in regenerated PDF directories.
Tip: Inactive families still show up on the Families page — they'll just appear grayed out — so you can always find and reactivate them later. If you'd rather not see inactive families in the list, use the filter option on the Families page to show active families only.
Delete a family
To completely and permanently remove a family from your directory, go to Families, find the family, and click Delete under the Edit Family button.
Deleting a family removes them from the family listing, generated PDFs, the online member website, and mobile apps, if those features are enabled.
Important: If you want a family removed from an existing PDF, be sure to regenerate the directory PDF and distribute the updated version.
Remove a person from a family
To remove one person from a family record, click Edit Family.
In the Adults/Parents or Children section, click the trash can icon next to that person's name, then confirm the deletion.
Need a walkthrough?
Watch the video below to see the process in action.